Walls serve as the canvas of our homes, setting the stage for interior design and comfortable living. Nevertheless, they’re not immune to the bumps and nicks that come with daily life. A dent in the wall, albeit minor, can detract from your home’s aesthetic appeal until there’s a fix.
If this isn’t something you’ve worked on before, you’re probably wondering where to start. Fortunately, rectifying this issue is simpler than one might think. Whether you’re sprucing up your space or prepping for a fresh coat of paint, this guide will equip you with the knowledge to seamlessly mend that wall dent, restoring the pristine look of your home’s interior.
What You’ll Need
Before we dive into the nuts and bolts, let’s ensure you have everything on hand. A successful wall repair job doesn’t just happen—it’s the result of preparation and having the right tools for the job. Here’s a checklist to successfully fix a dent in the wall:
- Waterproof Primer: To seal the drywall and prevent moisture from compromising your repair.
- Utility Knife: For precision cuts around the dent to create a clean area for filling.
- Matching Paint: Select a shade that corresponds to your current wall color for a seamless finish.
- Paintbrush or Roller: Depending on the size of the area, choose the right tool for a smooth application.
- Putty Knife: This will be essential for applying and smoothing the joint compound.
- Dust Mask: Safety first—protect yourself from inhaling any fine particles.
- Fine-Grit Sandpaper: To smooth out the repair area and ensure it’s flush with the surrounding wall.
- Joint Compound: The key ingredient to fill in the dent and make the wall look whole again.

Step-by-Step Wall Dent Repair
1. Prep the Wall
Creating a conducive work environment is crucial. Move aside any furniture and remove wall hangings to ensure full access to the damaged area. A clean, dust-free surface will enhance the compound’s adhesion, so don’t skip wiping down the wall with a damp cloth.
2. Score the Dent
Carefully outline the dent with your utility knife, expanding slightly beyond the damaged area. This step is vital for a secure bond between the existing wall and the new compound.
3. Sand for Success
Next, gently sand inside the scored perimeter. This roughens up the surface, allowing the primer and compound to grip more effectively.
4. Prime the Area
Then, apply a waterproof primer to the sanded area. This layer acts as a protective sealant for the drywall, ensuring durability.
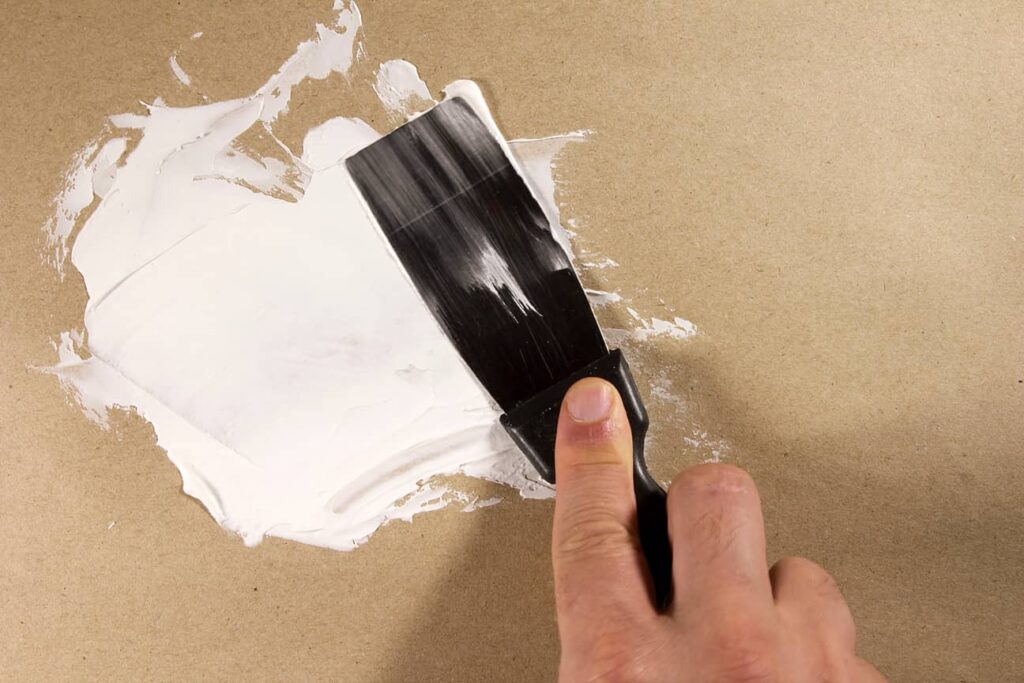
5. Apply the Joint Compound
Fill the dent with the joint compound using the putty knife, feathering out the edges to merge smoothly with the wall. Patience is key here; work slowly to achieve a flat, even layer.
6. Dry and Repeat
Allow the compound to dry completely. If necessary, apply a second coat to even out any discrepancies. Remember, the goal is a flat surface that’s indistinguishable from the rest of the wall.
7. Sand Smooth
Once dry, sand the area with a fine-grit sandpaper. Your objective is a smooth, flat finish that will be invisible once painted.
8. Paint to Perfection
Finally, paint over the repair. If you’ve matched your paint correctly and applied it evenly, the repair should blend in flawlessly with the surrounding wall.
Other Recommended Maintenance
Once you’ve mastered the art of wall dent repair, consider turning your attention to other maintenance tasks that can elevate the appearance and functionality of your home.
Whether it’s learning the art of caulking baseboards for a refined look, or understanding how to clean walls with various paint finishes without causing damage, these skills will serve you well. And if you’ve discovered that a doorknob is the culprit behind the wall dent, now is an excellent opportunity to learn about doorknob removal and installation.
When to Call a Professional
While a sense of accomplishment accompanies a successful DIY project, there are times when it’s prudent to call in the experts. Here’s how to tell when professional help might be the best choice:
- Large or Complex Dents: If the dent in your wall is large or if there’s a pattern of recurring damage, it might indicate a deeper structural issue. Professionals can assess and repair extensive damage more effectively.
- Matching Textured Walls: Texturing is an art form, and recreating the existing pattern on your wall can be challenging. If your walls have a unique texture, a skilled tradesperson can ensure the repair blends in seamlessly.
- Health and Safety Concerns: Repair work can involve exposure to dust and chemicals. If you have health concerns or lack the proper safety equipment, it’s wise to defer to a professional.
- Quality Assurance: Sometimes, you want the peace of mind that comes with a guaranteed fix. Professionals often offer warranties for their work, providing added assurance of the repair’s longevity.
Conclusion
In conclusion, learning to fix a dent in the wall is a very doable task. By following the steps outlined in this guide, you’re well on your way to restoring your walls to their original glory. However, if the project seems daunting or if your walls require specialized attention, don’t hesitate to reach out to professionals for guidance.
For any questions or to schedule an inspection of your home, reach out to Atkinson Inspection Services today in Clermont, FL, and surrounding areas.