Imagine that you enter your master bathroom and flip on the switches to turn the lights and the bathroom fan on. You think nothing of how the lights or fan are supposed to work, just the assumption that they have power and will function properly. At this point, the bathroom fan begins to sound loud and rickety as it vibrates against its housing. You realize that you do not have an attic and it might be difficult to replace the bathroom fan. How to install a bathroom fan without and attic access? This is a question asked by many people as not every home has an attic. Fortunately, it is possible to replace or install a bathroom exhaust fan without having attic access.
Let’s take a look below at what’s involved with replacing a bathroom exhaust fan.
What Is A Bathroom Fan
The purpose of the bathroom exhaust fan is to remove moisture from the bathroom, provide air circulation, and remove odors from the room. The ceiling bathroom exhaust fan can typically last you ten years. Issues begin to arise when the motor of the fan starts to fail and you begin hearing a loud humming or rattling noise coming from the fan. This is a clear indication that it is time to replace the bathroom exhaust fan.
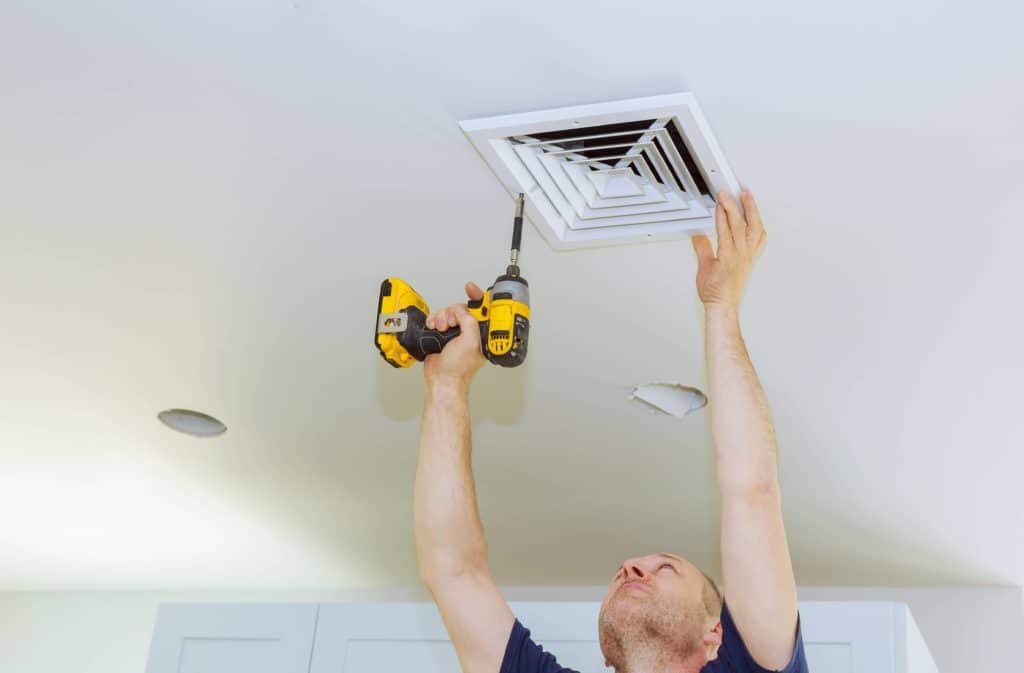
Removing Your Old Bathroom Fan
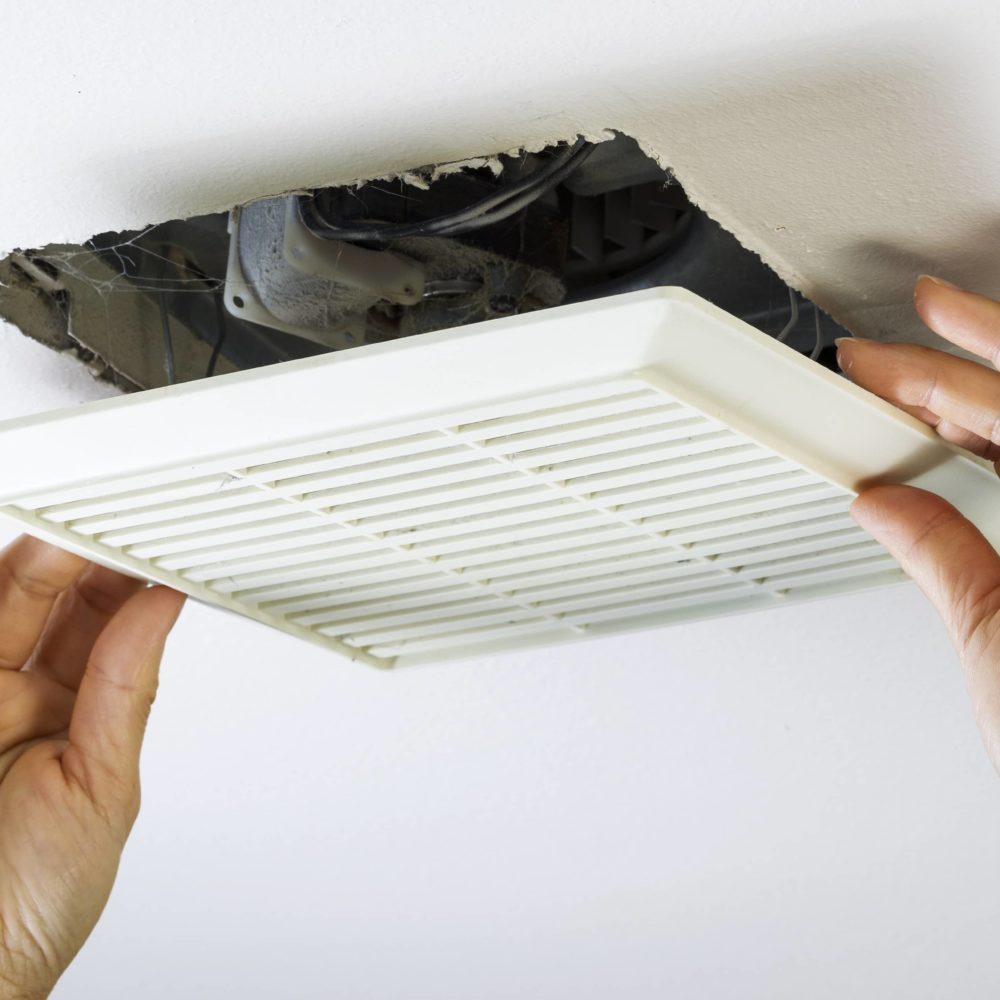
Let’s go ahead and remove the old exhaust fan. To do this, you’ll want to:
- Turn off the power of the circuit breaker.
- Remove the fan grill cover.
- Use a circuit tester to double-check that the power is off.
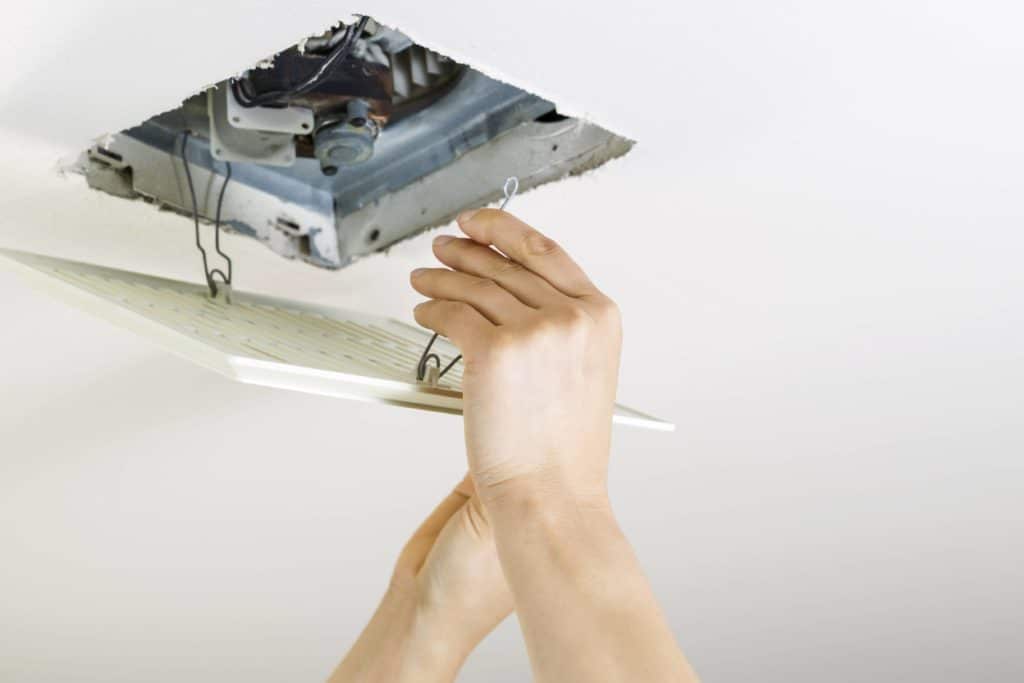
- Remove the fan motor. This requires disconnecting wires and a few screws
- Remove the fan’s housing. This requires the removal of brackets, screws, or other hardware. The fan’s housing is attached to the ceiling joists. The brackets or mounting screws can be removed from below.
Once you have removed the old ventilation fan, it’s best to read the specifications listed in the instructions before beginning the new installation.
Installing A New Bathroom Exhaust Fan
Now that we know the process to replace the existing fan. Let’s take a look at what’s involved with the installation of a new fan:
- Check the new exhaust size. Typically, you will have a 3″ or 4″ exhaust opening and will need to match the replacement fan accordingly.
- Bring the old wiring through so that you can connect the new exhaust fan.
- Connect the duct flapper or connector to the exhaust fan housing. This flapper or connector will open when the fan is on and close when the fan is off. This allows air to escape through the ductwork when the exhaust fan is operational.
- Attach your new housing assembly to the wood joists in your ceiling. Securing one side of the housing bracket to the wood joist is sufficient.
- Connect the fan to the wiring at this time. Most newer exhaust fans have quick connects. This makes it easier to connect the wiring from the home to the new exhaust fan. Be prepared to have twisting wire nuts in case your new fan does not have quick connects.
- Standard rule to follow for your homes wires is: hot wire connect (Black to Black), neutral wire connect (White to White), and ground wire connect (Green to Green).
- Use caulking to seal around the new installation.
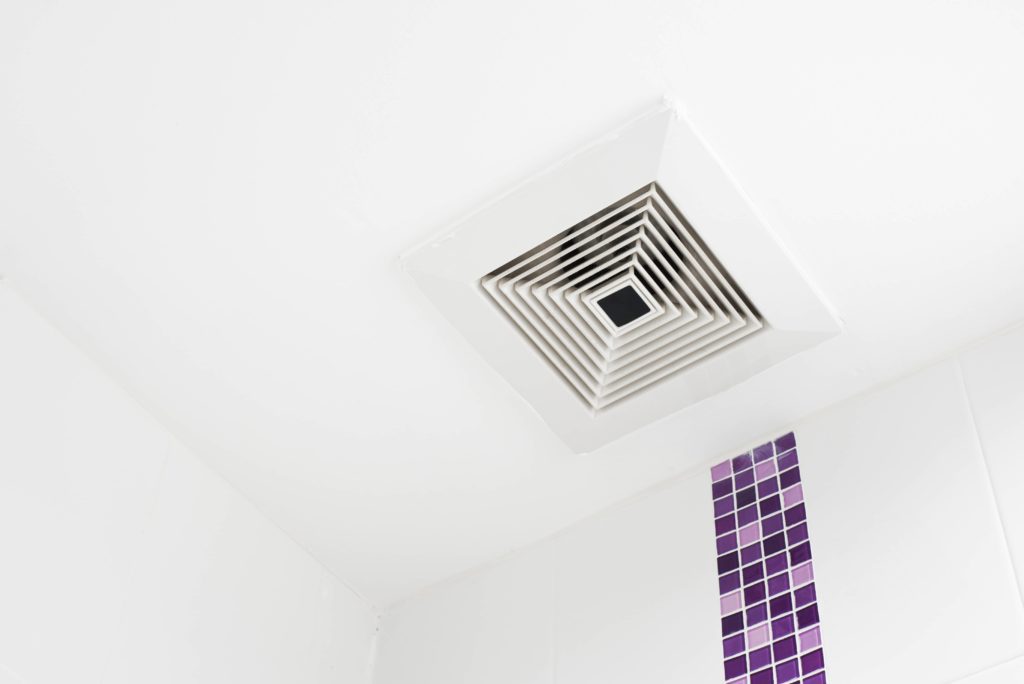
- Pop the new exhaust fan cover into place.
- Turn the electricity back on and flip the switch to make sure you connected your wires properly.
Although it is much easier to complete this project with attic space, not every home has the attic space available and thus, following the step-by-step process can reduce your project stress.
If you are installing a new vent and your home does not have attic access, you will need to either create attic access by opening the ceiling up or, you can vent the fan through an exterior wall instead.
What Will This Cost
When hiring a professional to complete any replacement projects the costs will have a varying range. This is because each contractor might have a different hourly rate to charge for the labor fee as well as their anticipated cost for the materials. On average you will be looking at around $400 for a new bathroom fan installation.
Other Recommended Maintenance
If you have discovered that you have Aluminum wiring in your home, then you will want to replace it immediately. This type of wire was used in homes built in the 1960s-70s and is a fire hazard so you want to make sure this is not in your home.
While you are exploring the types of wires that might be running to your electrical outlets and in this case the bathroom fan, you might want to check and make sure that you do not have a double-tapped breaker box. Many times a breaker box is meant to house one wire and if you have a double-tapped breaker box, this means you have two wires connected. This can lead to arcing and fires. So, take a look when you go out to shut off your power source for this project.
When Do I Call A Professional
Dealing with electrical wiring you will want to consult a professional electrician. Knowing what wires were used in your home is important before changing your bathroom fan. You will want to make sure that before installing a new bathroom fan, that your electrical wiring is up to date. This will avoid potential fire and disaster of the home.
Conclusion
Consulting a professional electrician and general contractor is always a great idea for this project. This will save you time and the heartache of potentially connecting the wrong wires or causing damage to your joist that holds the bathroom fan housing.
Calling on your local home inspection team is a great idea. They will be able to recommend which bathroom fan should be used based on your wiring and refer a quality general contractor to assist. Give Atkinson Inspection Services a call in the Orlando, Clermont, and Villages areas for a home inspection.